Good news for all of you who want to do more with your hair and makeup, but don't really know how to.
I've hooked up with the ladies from Salon Nfuse here in Nashville (hairstylists and makeup artists who've worked on everyone from Nicole Kidman to Julianne Hough) to do a series of hair and makeup how-tos.
We're starting today with daytime eye makeup that anyone can master!
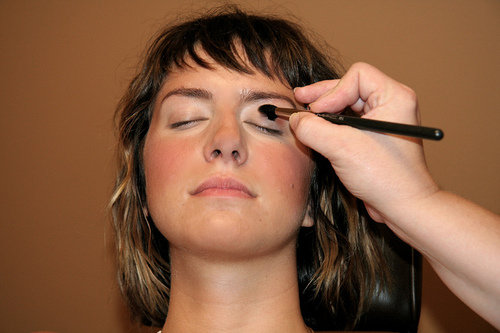
And our model here is the lovely Ellen, wearing an expression that I'm sure many of you have when you wake up in the morning and get a look at yourself in the mirror.
Want to know how to look more polished in under five minutes?
Read on!
Start out with your usual foundation/moisturizer or whatever else you use on your face.
Before I do anything to my eyes, I like to put a little M.A.C. Prep + Prime on my lids, but that is totally optional.
Next, sweep a neutral, matte brown shadow over your entire lid. This can be any shade, really, that's slightly warmer than your skin tone. The stylists at Salon Nfuse love Bamboo by M.A.C. I like Sienna by Mary Kay. Use what works for you — just make sure it's neutral.
This is a step I often skipped in the past, but not anymore after talking to makeup artist Stephanie Trail. She says a warm neutral shade keeps it from looking like you have an unblended, makeup-no makeup eyelid when you put on color. Makes TOTAL sense.
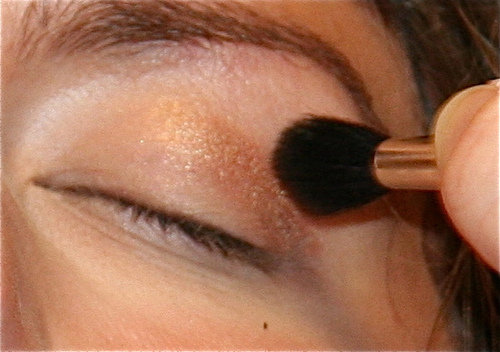
Next, put your color of choice (in this case, a shimmery golden brown by M.A.C. called Woodwinked) in a stroke over your eyelid that extends from your pupil down to the edge of your eye. Make a 'V' by adding another stroke across the bottom of your lid (by the lashline) from your outer eye back to your pupil. Use an eyeshadow brush to blend the color until it looks natural.
A couple of tips:
- Don't ever extend your eye makeup beyond the 'smile' of your eye — the smile shape that goes from your eye up to the end of your brow.
- Stephanie says 40 is a good cutoff age for sparkly, shimmery eye makeup. After that, use matte eyeshadow because the shimmery stuff tends to settle in lines and accentuate them.
- It's worth your while to invest in an eyeshadow brush or two. Stephanie said to NEVER use the brushes that come in your eyeshadow. She loves M.A.C. brush #224 for the job, but the makeup artists also recommended Sonia Kashuk's makeup brushes from Target for those of you on a budget. They said they're high quality brushes for the price.
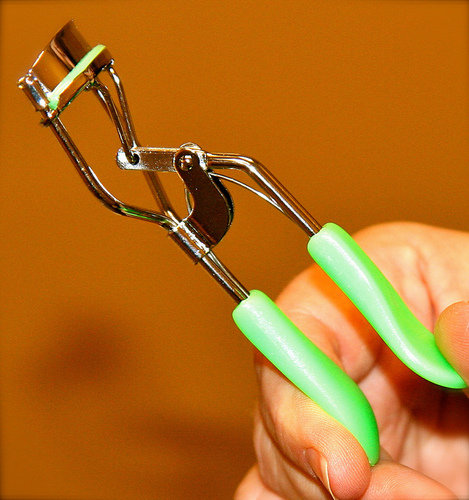
Next, take a few seconds to curl your lashes. Some great tips here:
- You don't have to spend lots of money on an eyelash curler. This one is Stephanie's favorite, and she got it at the Dollar Tree.
- Always curl your lashes BEFORE putting on mascara. Doing so afterward will damage them.
- Don't squeeze down tight to curl your lashes. It's damaging and doesn't give you the look you want. Instead, start close to your lashes and squeeze gently three times, then go out about midway down your lash and squeeze gently three times again.
- Do not heat your eyelash curler. I didn't know this was going on, but Stephanie said people lately are trying to heat their eyelash curler with a flat iron before using it. Um. No. Dangerous.

Finish up with mascara. Stephanie advises that you not use waterproof mascara every day, since it coats your lashes and over time can make them more brittle.
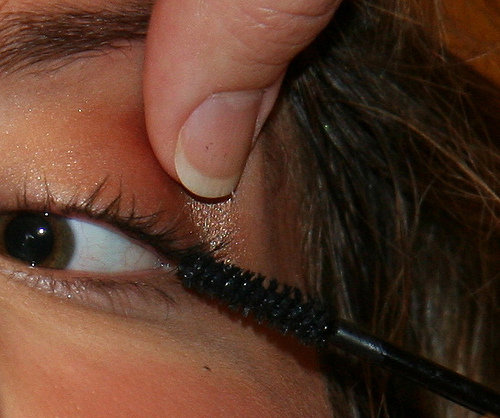
To get the lashes at the outer corner of your eyes, dab at them with the tip of the wand.
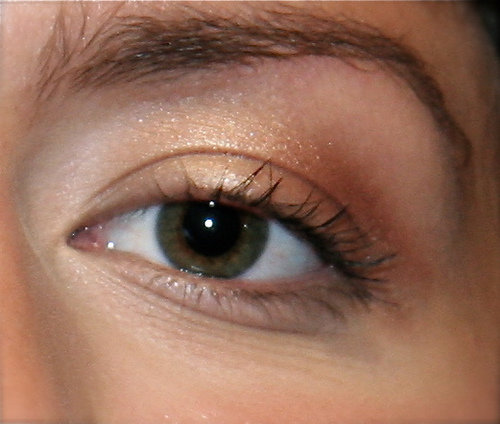
And here's your finished daytime eye! Pretty, yet natural looking.
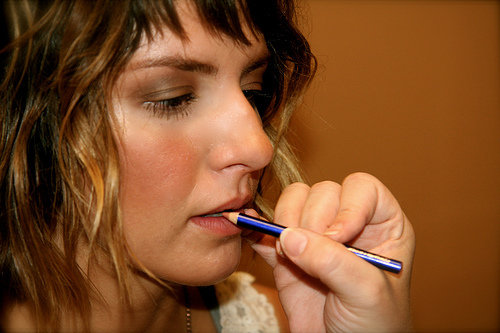
Finish up with a neutral lip pencil. Stephanie likes Estee Lauder's lip pencil in Spice. Top that off with a little lip balm or clear gloss if you like.
Tomorrow, I'll tell you how to go from day to night in under 10 minutes, and you can see Ellen's after shot!
What's your daytime eye makeup routine? Did you learn anything new from these tips?