I've lived in the same apartment for just over four years. While I have to walk up four flights, and have rumbling walls because I'm on the highway (#pureclass), I love the place dearly.
When my long-term roommate moved out in December, I conned my best friend into moving from Texas to join me in New York. I was as excited about revisiting our college days as I was for the opportunity to get a fresh start design-wise on my mostly neglected pad. For the first few days after her arrival, we let HGTV go to our heads and walked around the place saying charming and woefully out of context phrases like, "vintage feel", "the blank canvas" and "support walls".
The truth is, because I rent, my options dwindle when it comes to giving my place a cost-effective makeover. Swapping our furniture, putting up shelves, adding new shades and curtains, maybe a rug — these are expenses that I can justify. But a lot of the more serious cosmetic face-lifts ("LET'S REMODEL THE KITCHEN") aren't mountains worth climbing.
We settled on one real DIY project for Operation New Roommate: Painting the walls of the living room and kitchen. Before we began, each of the aforementioned rooms had one wall painted a bright yellow, or lime green respectively. While I appreciated the idea of an accent wall, the whole feel was pretty dated, and the bright colors looked dingy and juvenile with the new furniture we were bringing in.
1. Choose Your Color Wisely
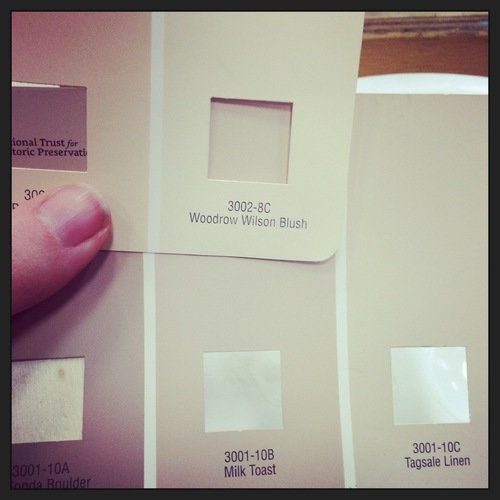
Color is everything. Keeping that stuff in mind, we selected a neutral, complimentary palate. Yeah that's right chickens, we went beige. This doesn't mean we went bland — in fact, the bold art we're hanging up later will serve as a nice pop of color against the warmer tones we selected. Also, one of them is called Woodrow Wilson Blush, and that noise is hilarious.
2. No wait — The Clothes Are Everything
Put on some skanky clothes you don't mind ruining. As I learned, a hat is also helpful. Ask me how many times I hit my head with the paint brush. The answer is all of the times.
3. Tools
Paint pans, a simple hand-roller with a surplus of roller brush replacements are a must. So is a cute little brush to get the part of the wall closest to the ceiling, floor, and around details like light switches. Get something to stir the paint with, or you'll wind up shredding a large cardboard poster sheath and looking like a doofus.
We also got some spackle to have on hand should we find any larger-than normal nail holes. It definitely came in useful — and so did some sandpaper to smooth down the excess spackle that was inevitable because I am not very good at this stuff. Fun fact: In a pinch, white toothpaste is a perfect twin for spackle, and smells minty fresh.

4. Plan Ahead of Mess
We made sure to use ordinary masking tape (of a bright color) to cover up the baseboards and protect the ceiling from paint. In case of additional whoopsies, I kept a damp rag tucked into my pants. Like a boss. We also lined the whole floor with garbage bags. Pro tip: Tape them to the floor. Have you ever slid across the room on a step stool? Well guess what — it's terrifying. The room looked at this point like a sloppy version of Dexter. I maybe realized I could never be a serial killer because I'd totally leave forensic evidence behind that would implicate me.
5. No but seriously — Timing Is Actually Everything
Make sure you relegate 48 hours to painting one room. Day one can be dedicated to putting off painting until it is dark and you can avoid it no longer. Then, under cover of night fall, using your roller brush, prime the walls with a basic, white primer. You'll want to skip this. Don't skip this step. Priming will save your life.
5. Prime, Prime, Prime
We used two coats on the brightly colored accent wall, and just one on the other walls — usually a good idea to get the walls so that they are all a comparable shade. Once this is done, open a window and whine about how your back hurts. During priming you can be pretty slap dash. Aim for general, if not obsessive evenness.
The next day, start painting as soon as you put on pants. You want the room to be sunny, so you can focus on even coverage. In terms of how much paint to buy, we bought one gallon for our large-ish living room, and we still have some left over, in spite of all my fretting. Try to be more even here than you were when priming.
6. Work a System
Applying color: I line each wall, doing the edges with the small brush and then filling in the walls from left to right in full, even vertical strokes — because I maybe have some form of OCD. Once you've covered the wall, do a quick check to make sure the coverage is even. Once you're done with the whole room, don't panic until it dries. There's a lot of evening out that happens in the drying process. Wait until it's set to eyeball for any little spots you might have missed. Then sit back, and avoid the dirty garbage bags, and enjoy your new room!
What DIY projects do you plan on tackling this year?
Image via iStock.com/Berezko


