Looking for a way to spruce up a room AND avoid having to haul your old and busted china cabinet to the dump?
I’ve got your solution right here. It’s cheap, it’s easy, and you can do it in a weekend.
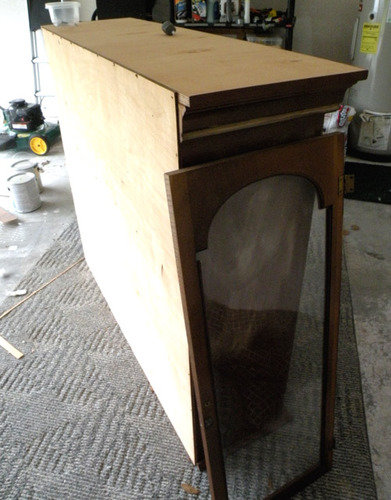
About a year ago, I was offered an old hutch — free, all I had to do was get it out of the woman’s house. It wasn’t the greatest piece of furniture — the glass panes are actually plexi, the top and the bottom were mismatched, and the cheap veneer was peeling in several places. But, as they say about houses, it had good bones. And I wanted a hutch. So I took it, and I gave it a complete America’s Next Top Model Miss Jay makeover.
Here’s how to get a gorgeous new piece of furniture while avoiding the tears that come with too-short hair (or in my case, a certain paint). I’ll also share a few secrets for special finishes, if you want to do more than just a monochrome paint.
First, a few dos and don’ts …
Don’t…
… Buy cheap paintbrushes — those hairs will come out all over the place and you’ll be stuck not only trying to pluck out bristles, but touching up your finger prints, which will only leave more bristles.
… Paint the inside of your piece with high gloss paint. Even if your house is at 0% humidity, whatever you put in there will stick to the paint, and the felt bottom of your antique camera will come off, and you will cry. And we aren't going to talk about the brush marks. Shhhh!
… Use an oil-based paint, unless you never want your furniture to dry. Ever.
… Rush the job. Be patient. If you get too impatient, you'll screw up the undercoats of paint, just like with nail polish.
Do…
… Buy a good quality, angled brush. My favorite is about 2” and has a medium length handle.
… Sand thoroughly. Any spot that doesn’t get sanded won’t grab the paint, and you’ll be very frustrated.
… Use an awesome oil-based primer + sealer, and use multiple coats, especially if your wood is dark.
… Wipe down and vacuum out the piece after sanding and before painting. Any dust particles left in there will get sealed into your paint and create a texture you don’t want.
… Use drop cloths. You will be amazed at the places paint will go. (Including on the dog, whose tail will then take it straight to your brand-new couch.)
You’ll need some materials:
- Paint brush
- Drop cloth
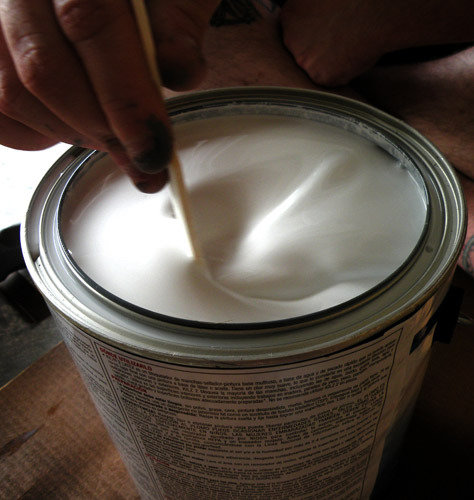
- Oil-based primer (I like Kilz, because it seals and primes)
- Latex paint (semi-gloss or flat is best) in your choice of colors
- Wood filler
- Fine-grit sandpaper
- Lint-free rags
- Paint tray (or, if you’re cheap, Gladware!)
- New hardware, if desired
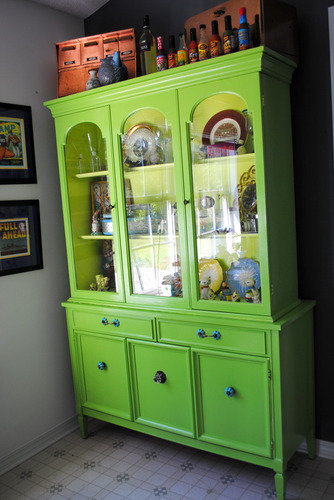
I wanted my drab, ultra-seventies hutch to be bright, colorful, and a little more … 2010. So I picked a really bright green for the outside, and a light greenish-yellow for the interior — I figured once the inside was no longer dark brown, I might actually be able to see what was in there. I also wanted more modern hardware when I was done, something that matched my personality, so instead of refinishing what I already had (with the exception of two keys in the top), I bought new hardware. If you choose to re-use your current hardware, there are tons of ways to go: just plain cleaning, paint, metallic leafing, faux finish…

Step 1: Prep time! My least favorite part, because I always want to just get going — but this is essential for a good finished product.
Pick your workspace — I went with the garage — and lay down a drop cloth or other protective covering. Since I was in the garage, I just used the crappy rugs we had down, but once I moved inside for the finishing touches, I threw down one of those cheap plastic drop cloths.
Remove all the hardware, as they will get in the way and/or get unwanted paint on them. You may also want to remove doors or drawers to make painting easier.
Fill any holes and cracks with wood filler, especially the hardware holes if you are replacing it. Once the filler is dry, sand it down level with the wood and wipe clean.

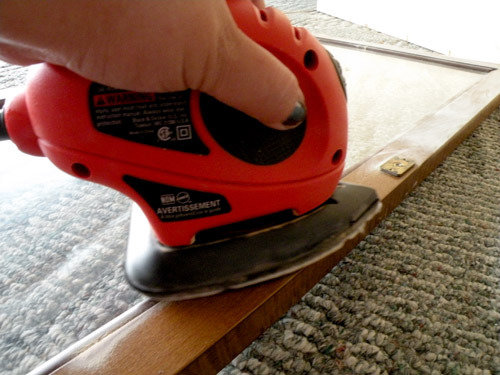
Start sanding. You’ll want every surface roughed up, including any detail work — ridges and dips, everything. Any part of the wood that retains its old finish just won’t hold the new paint well, even with primer.
Clean up, then tape up. After sanding, vacuum all the areas you can, and wipe everything with a damp rag to make sure all the sawdust is up. If there are areas you don’t want to paint, such as the insides of drawers or glass, tape them off now.

Step 2: Priming This part’s easy. Paint on the primer. Every nook and cranny. If you are painting a piece that's especially dark, you may need to do two coats. In this case, after the first coat dries completely, very lightly sand it, and then wipe off the dust. Apply the second coat of primer and let dry completely.
Step 3: Painting Another easy step! You just paint. Some people prefer to use small rollers to paint, but I like the angles and versatility of a brush — but it’s completely up to you. You will probably need at least two coats of paint, but be prepared to touch up in certain areas. Be sure to let each coat dry in between paintings. I highly recommend also painting the back of the piece, and in my case, the top — it just adds a bit of a finish to it.

Step 4: Hardware If you are keeping the original hardware, give it a good cleaning and simply reattach. If you’ve bought new hardware that's a different size from the originals, you’ll need to drill new holes before attaching.
Step 5: Admire yourself Admire your new piece of furniture while you’re at it.
Extra Credit: Special Finishes
If you want to go a step further with your piece, there are tons of things you can do. Distress it by lightly running a piece of sandpaper over the corners and raised edges. Add some metallic touches with silver or gold leaf. Use one of the special faux finish kits from the craft store to create a patina, crackle, or other finish. Use a furniture wax or translucent glaze to age the paint or add another layer of color. And that’s just a sampling!
Have you ever refurbished a piece of furniture? What techniques did you use?


