I’m gonna let you in on a little secret.
Artists and Lowe’s and The Home Depot and TileWorldUSA- UniverseAmerica all want you to believe that installing a gorgeous custom backsplash is just so hard and your itty bitty wittle bwain won’t be able to figure out how to do it, much less do it right.
Do you hear that sound? That’s the giant lie-detector buzzer madly firing in the background.
Because, really, it’s incredibly, stupidly simple to install a backsplash, even one that you design to custom specifications. It just takes a bit of work and a bit of time (a weekend or two, max).
Know what else? It doesn’t have to be expensive.
Last big secret? It only takes four steps. FOUR!
I built a 15-square-foot custom backsplash for about $150. Now, it’s true, you could spend more depending on the materials you choose — but you could also spend a lot less. Here’s how to do it.

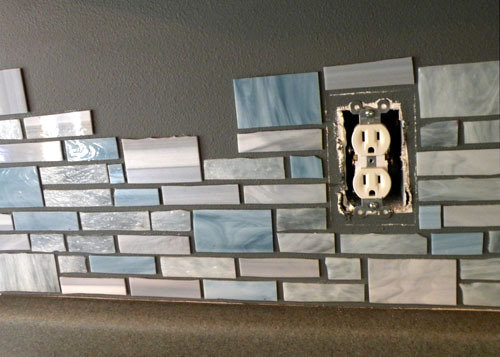
Pick and prep your materials. I chose stained glass. Bought from an online source like Delphi, I spent less than $100 to buy all the glass I needed. I love glass because it’s easy to work with and easy to cut, so I could get the custom mosaic look I wanted. You can use other materials: tile, broken china, half marbles. I took about a half hour to decide on my pattern (I went easy and geometric), and about 10 hours total cutting glass, including the time needed to cut custom sizes during installation.
Start installing. You’ll need an appropriate adhesive: I love Lexel for anything glass or translucent — it dries clear, won’t discolor over time, and remains flexible when dry. It also isn’t affected by heat, which was a must since my backsplash runs behind the stove. It dries quickly, so I didn’t have problems with my tiles sliding — which means I didn’t have to use those bothersome foam spacers between every piece.

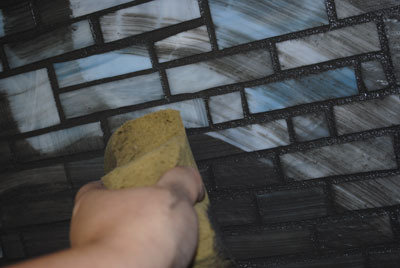
Grout and clean. I always go for a color other than white, for the same reason I won’t wear white pants: It gets dirty and you will NEVER get that stain out. Grouting is easy, but messy — so tape off anything you don’t want it on and put down drop cloths. Then just follow the directions on the package. Tip: if you are flying solo on the project and grouting a large area, mix a small amount at a time and grout in small areas. You’ll be able to properly clean each section before moving on. Clean your grout with a damp sponge — this will take many wipe-and-rinse repetitions, but it’s worth it. Before you move on, take a dry towel and remove every last bit of grout dust on your tiles.
Seal. This used to be a ridiculously time consuming activity, but sealants have come a long way. I used an aerosol — it was just like shooting hairspray at the wall. Making sure to mop up any big drips, I sealed my entire backsplash in about 10 minutes. I did two more coats, because I just like to make sure, but the first coat would have been more than enough. The sealant didn’t even leave deposits on my glass.
Just like that, it was done!


