Eyebrows are unequivocally the most defining feature on someone's face. Like it or not, the way they're groomed can totally transform a person's look. However, I've never felt very confident with my daily eyebrow routine — but I decided to face my fears and master doing my brows, no matter how long it took.
Here's my day-by-day journey to mastering an eyebrow routine that worked for me.
Over the years, I've had a rather interesting relationship with my brows.

As a kid, I wasn't allowed to pluck them. Trust me, growing up in the early 2000s with bushy eyebrows while everyone had pencil-thin ones was ROUGH. My family has always been proud of their bold brows, but it really took until I went to college that I truly learned to appreciate my fuller brows.
Aesthetically talking, when it comes to my brows, I like the fact that they're full closer to my nose, but they drastically thin out toward the ends, which I hate. I've also always wanted a higher arch, something more dramatic than what I already have.
I enlisted Jess to be my Brow guru, since, after all, she's always been my #browgoals.
Jess is OBSESSED with doing brows, so I knew that I was in good hands. Do you see that arch? Do you see that fullness throughout? Bless.
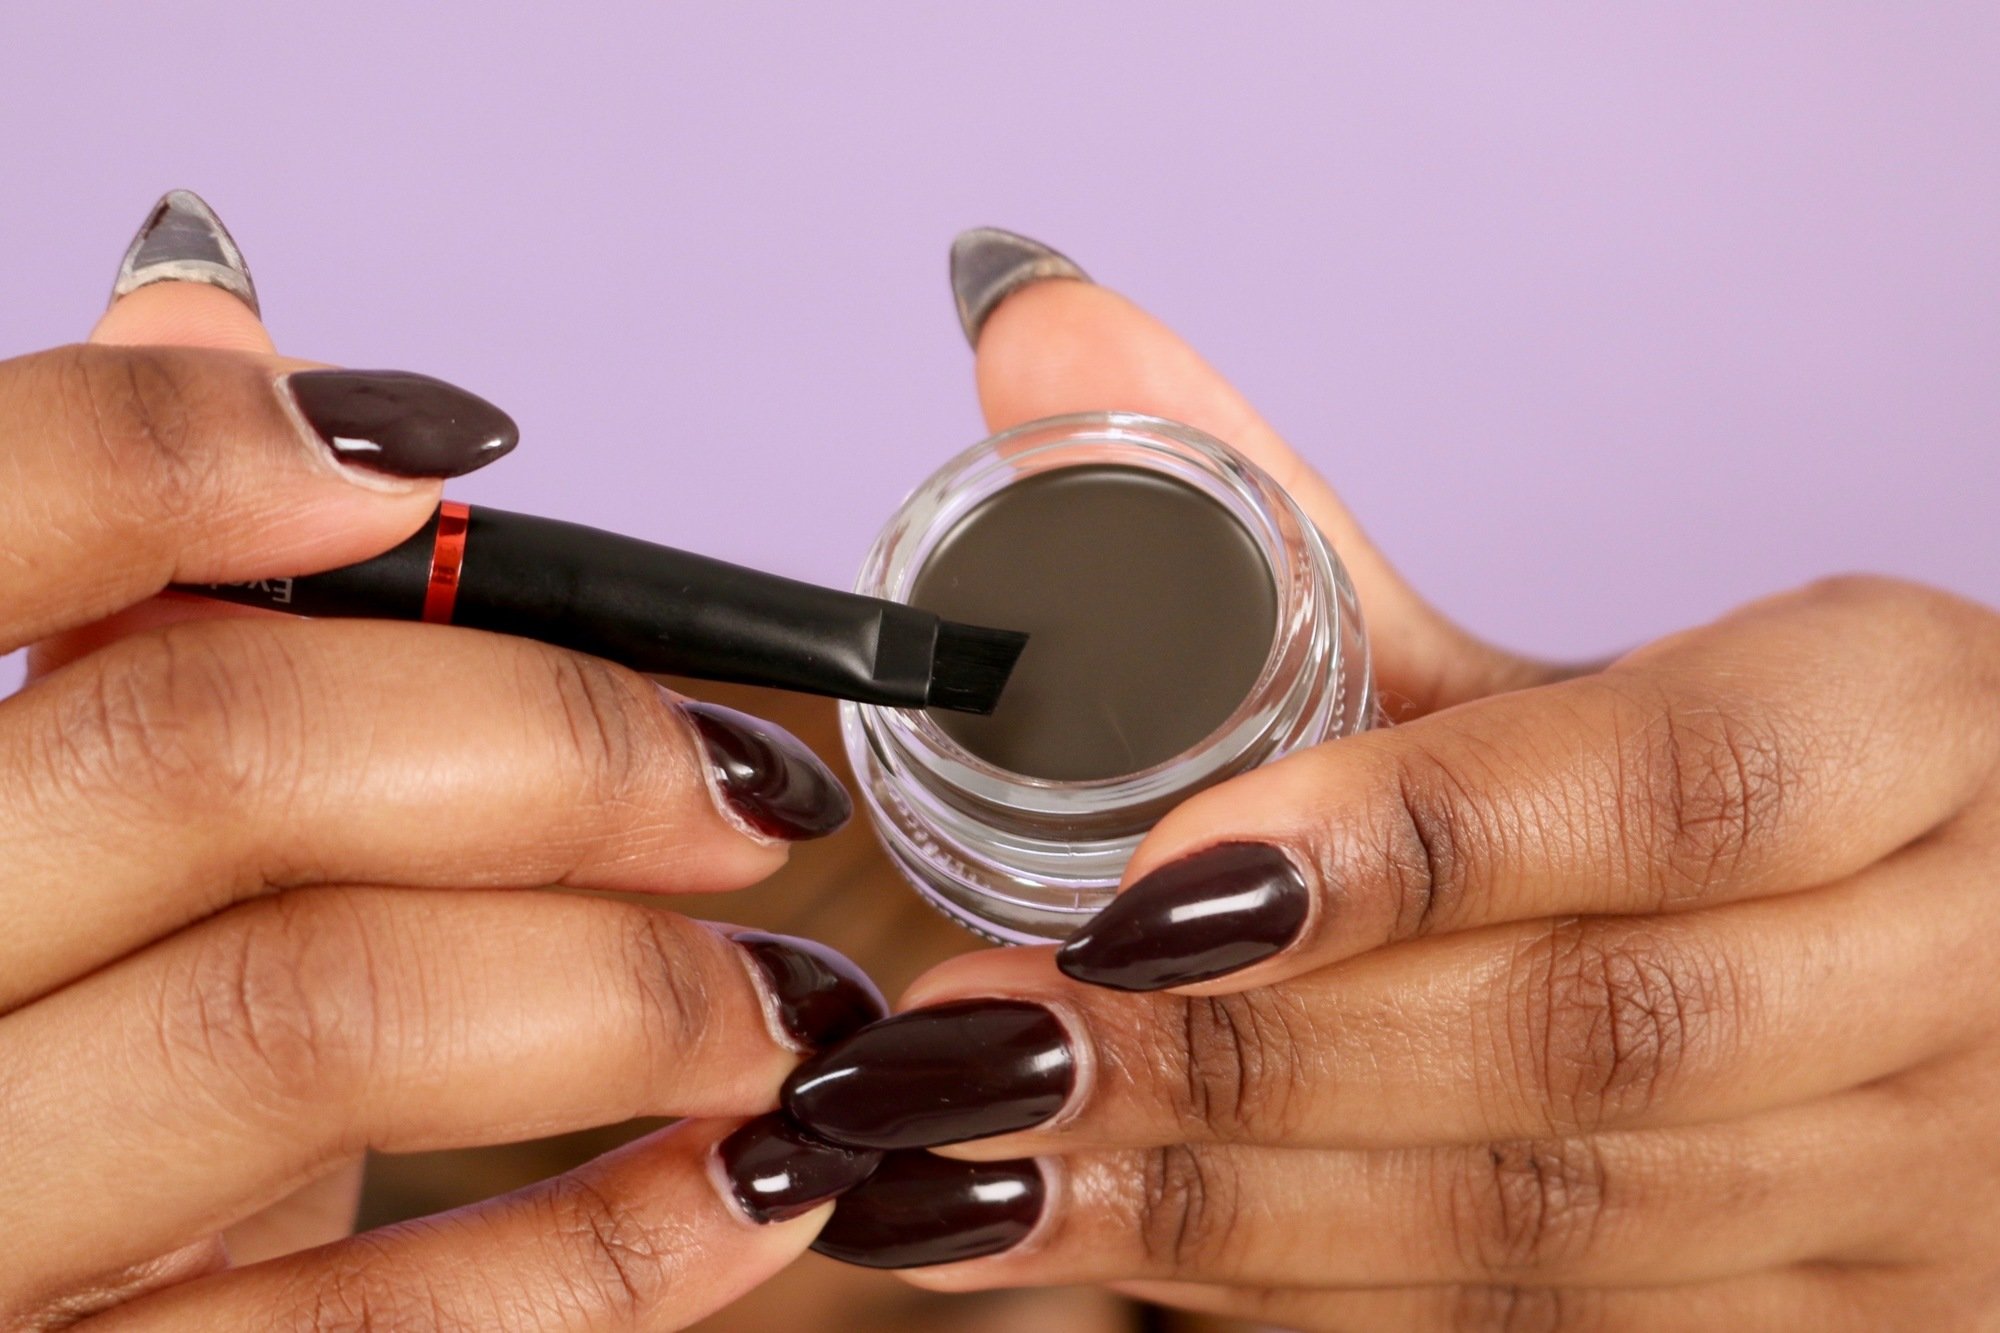
Here are my tools of the trade. Revlon eyebrow brushes:


And most importantly, my face.

This is what my eyebrows look like without any product.
On the first day, Jess talked me through it, but I was shaking the whole time.

Do you see the intensity in my eyes? Yeah, that's me trying not to end up looking like Oscar the Grouch while Jess instructs me on what to do. I kept wondering, What if I mess up and have to start all over (and over and over)? Jess told me not to sweat it, reminding me that mistakes are OK and bound to happen!
The steps she gave me consisted of the following:
Step one: Draw a line on the bottom part of your brows to create the base.
Step two: Fill them in starting from the middle of the brow to the tail.
Step three: Fill in the tip of your brow with whatever brow product you have left. Going lighter in the front/beginning of the brows makes them look so much more natural.
Step four: Clean around with concealer or foundation.
Here's my first try all by myself. Can you see any product? Because I sure can't!

BOY, was I nervous on this first day. I was trying to make my brows look fuller near the ends, but it simply didn't work.
Day two: Jess showed me the ways.

I did the eyebrow in the left picture, while Jess did the eyebrow on the right. You can CLEARLY tell the difference. Although I was disappointed with how different my brow was to Jess', I was hopeful I would improve.
Day three: It was a rough start.

Pro tip: Do NOT start your eyebrow journey at 3 am with minimal sleep. I wouldn't have stepped out even just to get a bagel with my eyebrows like this. My early morning eyebrow skills just weren't good enough yet.
Day four: I was getting a tad better.

On the fourth day, I thought, Hey, this won't be as hard as I thought it would be! But alas, I was wrong. Thank goodness for foundation because it was smudge city until I cleaned it up!
But I can't lie, I felt a little cocky that my eyebrows looked like this on day four.
Day five: The left eyebrow presents a challenge.

On this day I felt as if the tail-end would never get it together. I could easily do the beginning of the brow, but when I got to the end? TRAGEDY. I kept getting frustrated, but I was too afraid to go too heavy on the product since I'd never seen my eyebrows that bold before! I realized that my brows would just be cousins, not even sisters, that day.
Day six: Time to try bold brows.

On day six, I was shook. Since I was having #issues with the ends of my brows being too light, I went slightly heavier on the product. The results stunned me!
This was the BOLDEST I'd ever seen my brows, and frankly, I thought I'd done something wrong. Of course, many days later I would realize I was actually on the right track. The bolder, the better!
Day seven: I went for the LONGGGG brows.

OK, I started getting ahead of myself. I had fully embraced using more product and started piling it on to the ends of my brows. I wasn't going to be ruled by eyebrow fear!
I think I'd had a little too much fun on this day, though, since the ends of these brows almost reached my hairline. Maybe I should've pulled back a bit.
Day eight: My brows were basically fraternal twins.

On day eight, I felt like I was back to square one. I was frustrated because the past few days I had been doing better, but the ends of my eyebrows WOULD NOT COOPERATE.
I'm proud of the eyebrow in the left picture, since the arch was on point. However, I just couldn't match it to the right, and once again, I left my eyebrow journey frustrated that day.
Day nine: There's hope, America.

After slowing down and realizing that eyebrow mistakes are OK, I realized my arches weren't too bad this try! I really, really liked the arch in the left picture, and when compared to the eyebrow on the right, it felt close.
Day 10: HELP.

OK, I don't really know what happened here. After passing with flying colors the past few days by mastering using more product and getting a good arch, I once again got a little too cocky. Arched eyebrows? Easy peasy, I thought. Haha, wrong. So wrong.
Day 11: The left eyebrow stayed trippin'.

OK, this is where my left eyebrow (far right picture) began its descent into madness. You see the other eyebrow is flawless and proud, but the left eyebrow is slightly smudged and a little too thicc? Yeah, I was furious, too.
Day 12: There's hope!

I was VERY proud of this day, because my eyebrows looked fuller AND looked natural!
*pats self on back*
Day 13: The arch strikes back.

You see the arch in the far left picture? KA-POW. I was still struggling to replicate that on the other eyebrow, though. Sigh.
Day 14: I achieved "Proud Mary" browz.

Although they might not be as *neat* as the other days, I really liked the length on these brows. I've always wanted longer brows that didn't suddenly thin out at the ends, so I was getting closer to my #browgoals.
Day 15: The ends still aren't working.

Oh, boy. Yes, I know my face was slayed, but my brows just didn't want to live up to their fullest potential. I was proud that I achieved the fullness near the front of the brow, but I still went a little too heavy on the ends (clearly).
I would say that at this point I WAS comfortable with using more product, since before I was afraid of having brows that were TOO defined. So this was progress, in a way.
Day 16: The brows became sisters at last.

Remember when I noted that my brows barely looked related at the beginning of this journey? Well, they finally found each other and got along!
Although it was time for me to get my brows cleaned up, I liked how natural my brows looked. The ends looked full, and there was an arch! Progress at last.
Day 17: I nailed consistent arches.

It had been so hard for me to 1) make an arch and 2) to have them match. Finally, on day 17, I reached my goal and got the arches of my dream.
Day 18: #Browgoalz all day EVERY day.

My hope was to be able to replicate the brows that I'd wanted on a consistent basis, and I finally did it! They have the fullness (and fierceness) that I'd always admired in Jess' brows, but with my own approach.
Day 19: Eureka!

After NINETEEN DAYS of endless practice, I finally had it down. My eyebrows looked fuller AND arched, which is what I always wanted. Yes, there are some stragglers, but I think it helps give my brows a more natural look for my face.
"I think they look great. Mary mastered a skill that took me years to perfect," Jess, queen of brows, said.

"Is she going to go for straight brows? Higher arches? Only time will tell," Jess said. "I am very proud of her and cannot wait to see how doing her eyebrows evolves with time."
Final thoughts: It's good to face your fears, even when those fears are your own eyebrows.

For years I'd always avoided eyebrow products because I was afraid of making mistakes. I'm glad I tackled this fear, even though it took over two weeks to do so. I've learned that fully slayed brows take time, and that it's definitely something worth waiting for.
Now on to mastering my lip line!
WATCH: Seven steps to perfect eyebrows — Subscribe for more!
Subscribe to Revelist on YouTube for a gorgeous life!